Marlin Guide Gun – Make Over
If your a Winchester fan click here for a 94 Trapper Conversion http://leverguns.sixgunner.com/topic.asp?TOPIC_ID=28760
I have always admired the Marlin 1895G and the 45/70 Cartridge that it is chambered for but I knew there would be a few things I would change as soon as I got mine.
I’ll list those changes here, with a brief explanation how to and a few photo’s that I took wile doing my Guide Gun, in case any one wants to give it a try themselves.
My gun does not have some big name gunsmith etched into the receiver, but it does have my fingerprints all over it and I have the satisfaction of doing the work myself.
I have been gunsmithing my own, friends and family’s guns for over 20 years now, if I need a tool I’ll buy it instead of paying a gunsmith. One good project if you were to pay to have it done, could set a person up with a good basic set of tools right off the bat.
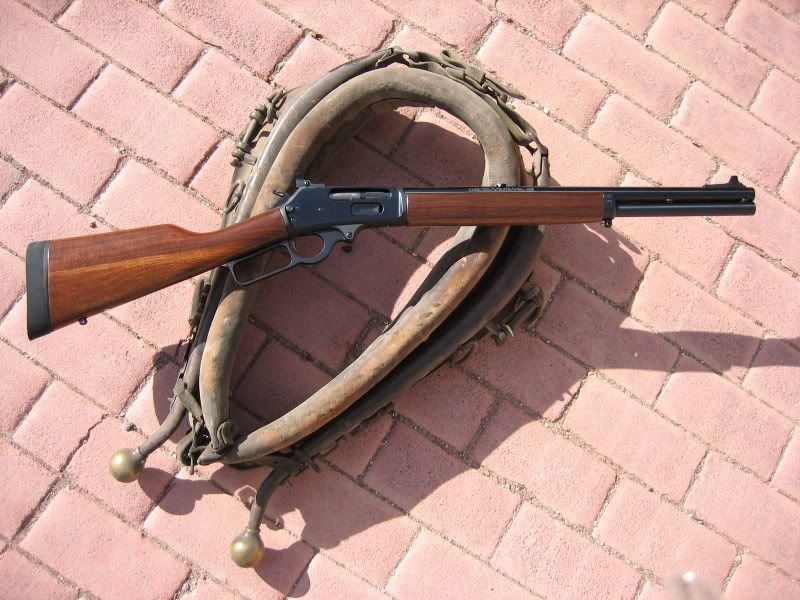
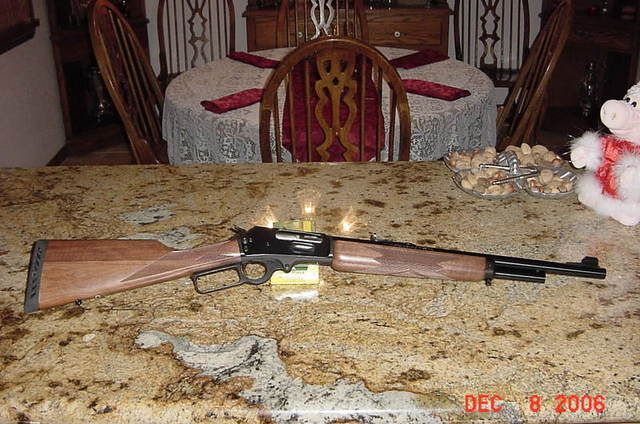
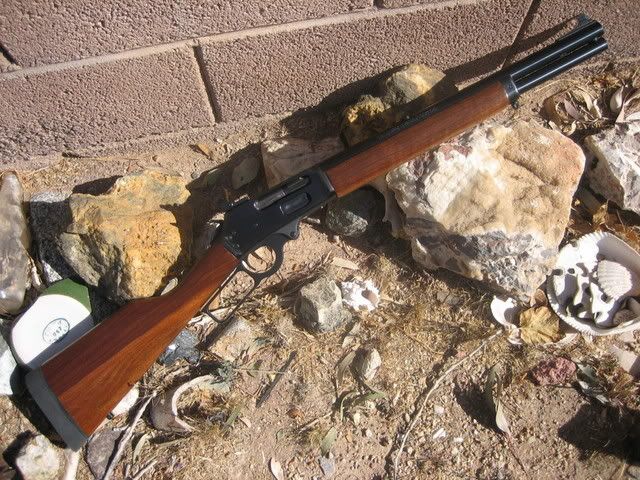
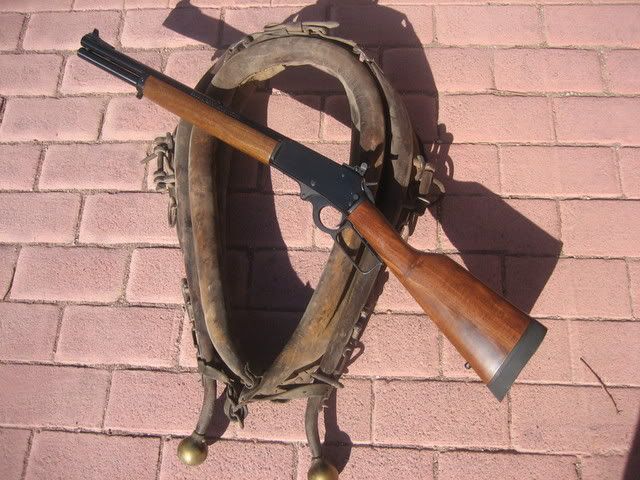
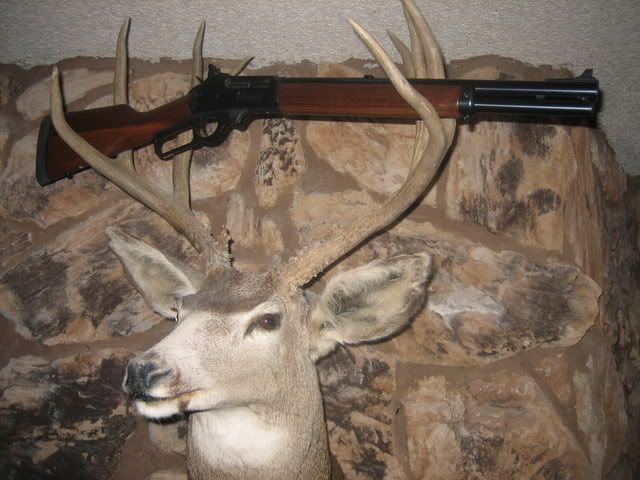
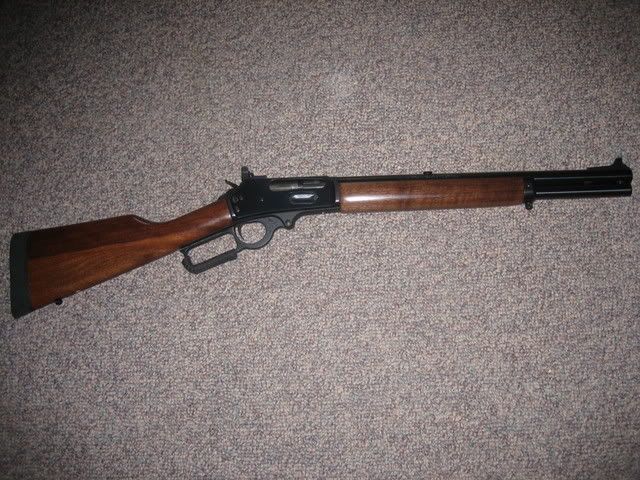
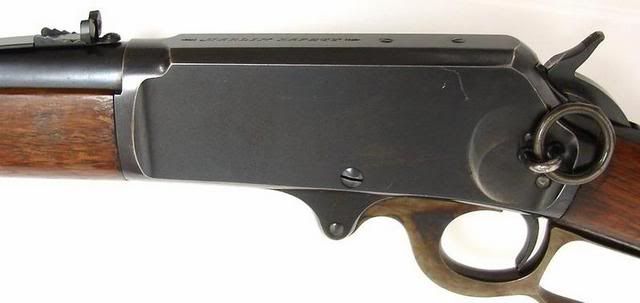
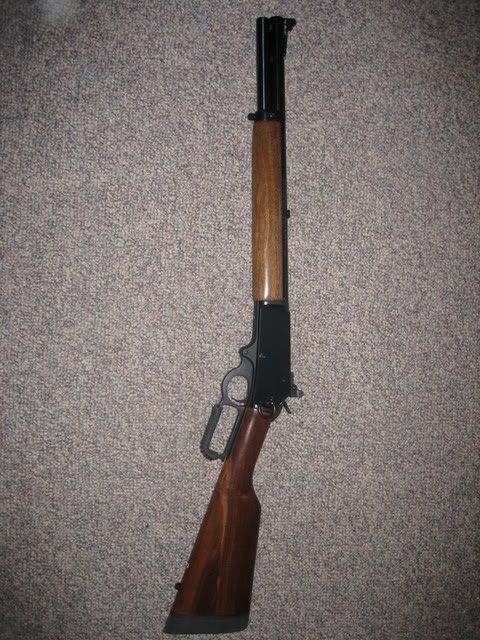
This is what my Guide Gun looked like brand new less than a month ago.
Slick-up the action!
When in doubt Google it, there is a lot written about action work on the Marlins, but I found a nice little write up by “Sure-Shot” at http://www.marlinowners.com/board/viewtopic.php?t=488
Thank you Sure-Shot!
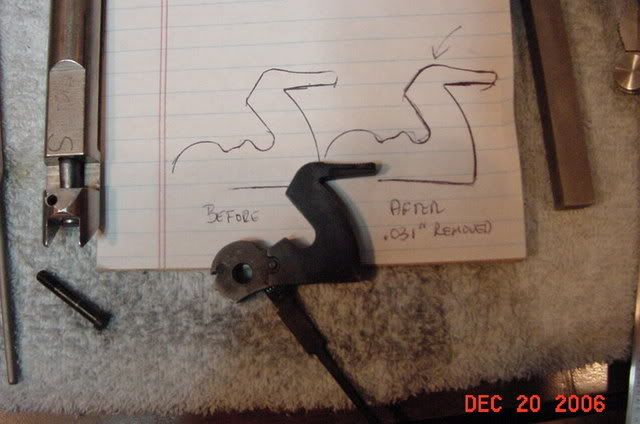
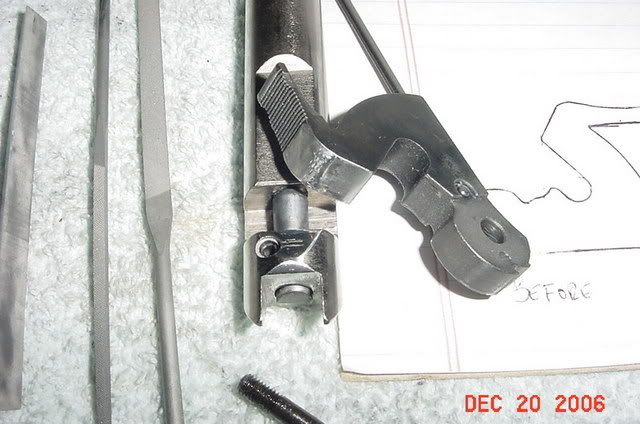
I did not cut/shorten the hammer spring or the plunger spring on the lever lock, since I wanted this gun to be 100% reliable. I also stoned the hammer notch down a bit so there is no creep in the trigger and I polished the sear, giving my GG a nice crisp 2.5# trigger pull. Here is a couple of pictures of the modifications to the hammer witch is probably the most difficult aspect of this project.
By removing the excess material on the hammer it reduces hammer overtravel, between that, polishing the ejector and polishing the ejector cut on the bolt most of the friction/drag is eliminated!
Recoil Pad and Length Of Pull
The stock recoil pad is not to bad, but there are better and since I wanted to adjust the LOP I figured it was a good time to install a LimbSaver grind to fit pad.
The stock LOP of 13.5” is a good compromise for most people and is actually perfect for me, if you go by the tried and true measuring from your bent arm inside elbow to the tip of your trigger finger then deduct one inch = your LOP
I love peep/ghost ring sights and I have found the closer your eye is to them the better (To a degree) so I decided to go for a LOP of 12.5” to make up for heavy clothing, get my eye a little closer to the Brockman peep and shorten the overall package by one inch.
The LimbSaver is thicker than stock pad so even if you wanted to maintain the stock LOP you would need to cut the buttstock. If you’re a tall long armed fellow you can gain a quarter inch or so and leave it as is.
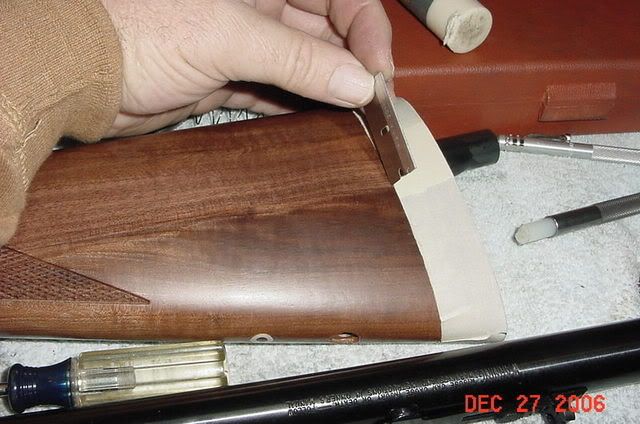
I’ve installed quite a few recoil pads, this is how I do it, I know there are others, you could even follow the instructions that come with the pad!
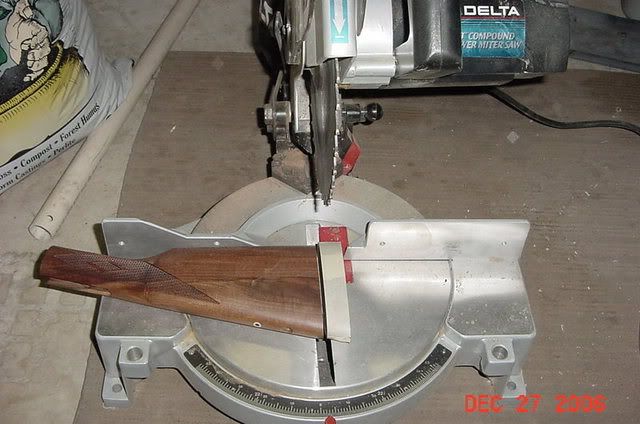
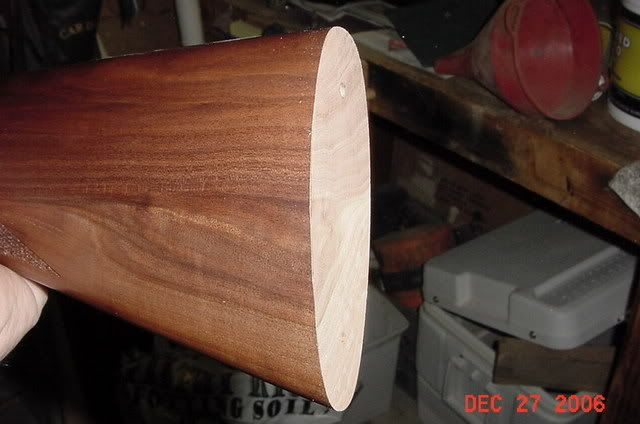
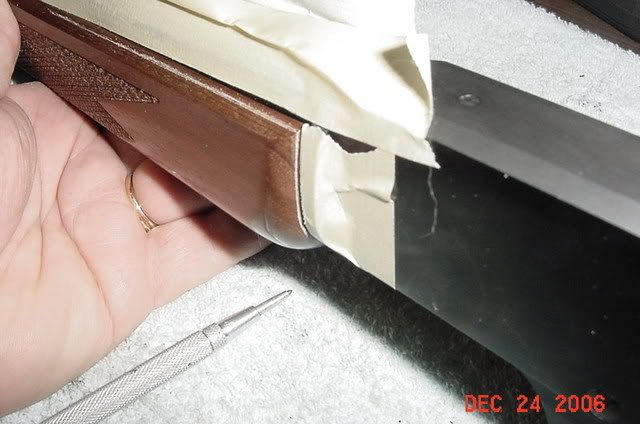
Measure and mark your buttstock with masking tape, I mark the side that I am cutting, then I carefully run a razorblade cut around the line, it does not have to be deep at all just deep enough to cut into the wood. If you do this you will never get a splinter run up into your butt stock! I cut the buttstock in a chop saw, lay the stock down and adjust the blade next to the butt stock were the old pad came off so you get the exact angles adjusted for the cut, then readjust your stock so the blade cuts on your tape line and you will have a perfect cut.
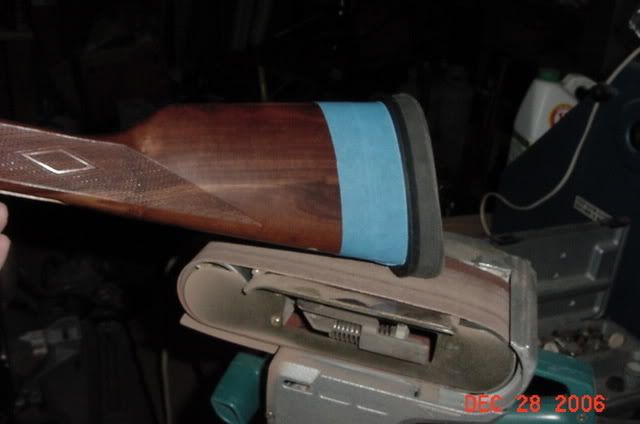
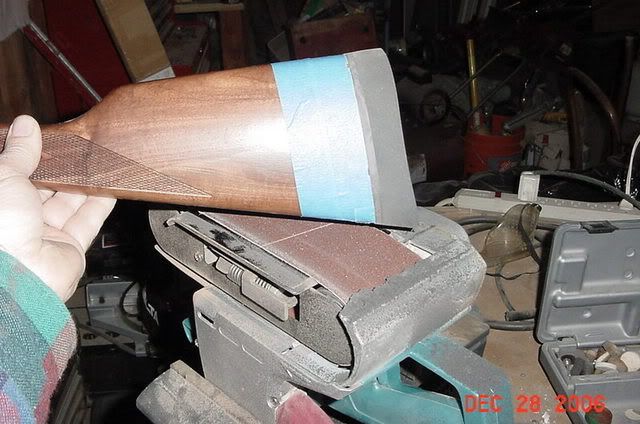
Installing the LimbSaver, order the small size the mounting holes match the existing holes perfectly, I only needed to extend them deeper in the stock, I used car wax on the screws to screw the screws into the new holes. After getting the holes “Tapped” install the grind to fit pad and wrap your stock with masking tape, I use one layer only so I can get close, until you get the hang of it give it 3-4 layers of tape. An upright belt sander would be nice but I have been using a hand belt sander chucked in a bench vice for so long I prefer it. Work the pad down taking your time and pay close attention to the lines of your buttstock, most importantly at the top and bottom you want these lines to run exactly with your pad if you want a professional looking job!
Final fit the pad on a sheet of glass and wet and dry sandpaper using WD-40 as a lubricant. Freeze the pad over night and go real fine on the paper if you want a super fine finish on your pad.
If your careful wile you are grinding your pad and don’t grind through the tape, all you need to do is seal up the new cut on the stock and mount the pad.
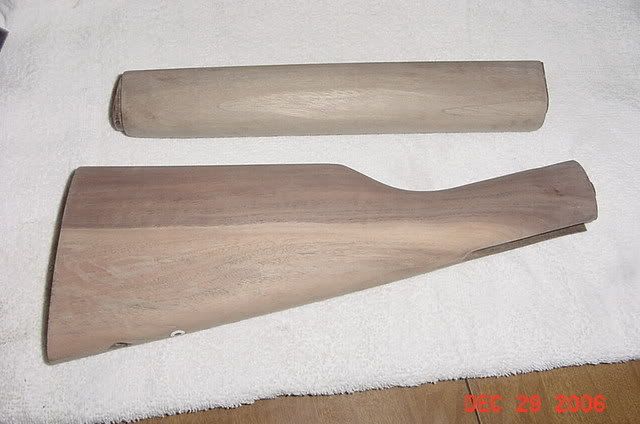
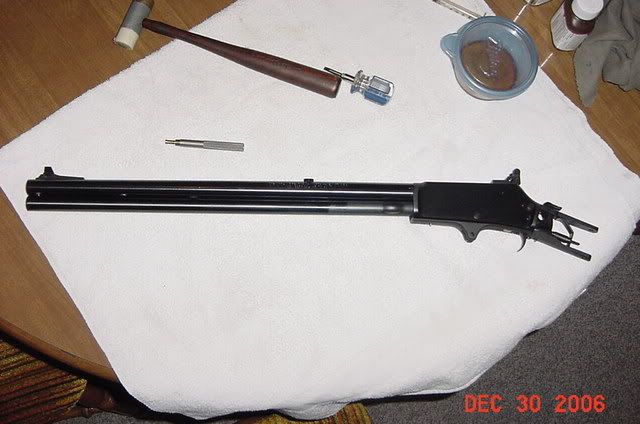
Fat Forend Re-contoured
The fat forend, is just one of those things that I have never got use to on the Marlins and is probably why I own more Winchesters than Marlins ;-) this modification is strictly cosmetic and makes the Guide Gun look trim and lean instead of short and stocky, definitely worth the trouble in my book! My GG is now one inch shorter but because of the forend it actually looks longer.
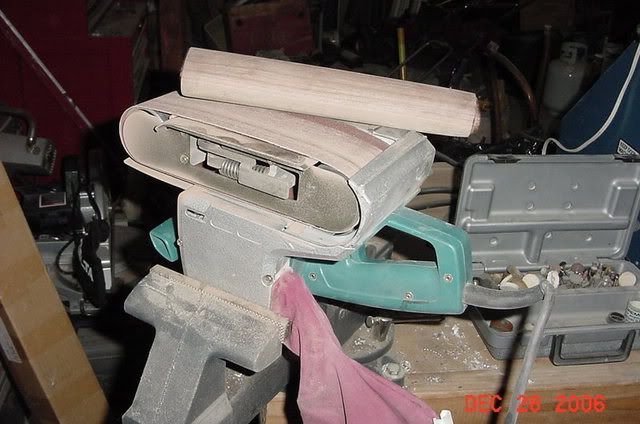
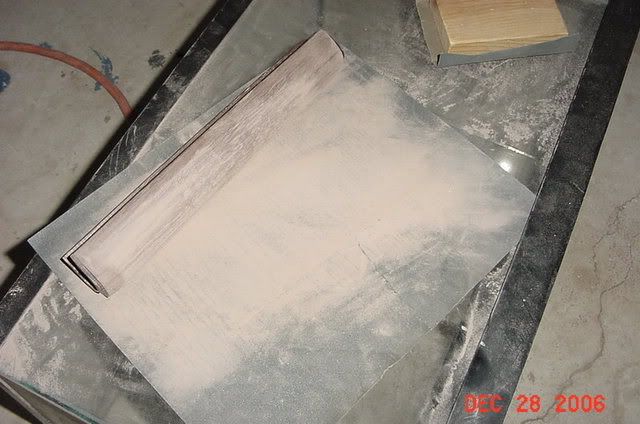
First thing you want to do is scribe some lines on your forend so you have something to go by wile you sand the forend to your perfect shape. Again use a belt sander to get the forend close to the scribed lines, from that point move to a piece of glass and sheets of sandpaper. (I used an old 10-gallon aquarium) Basically you need a flat surface to pull and level out your scribed lines together and level out any low/high spots.
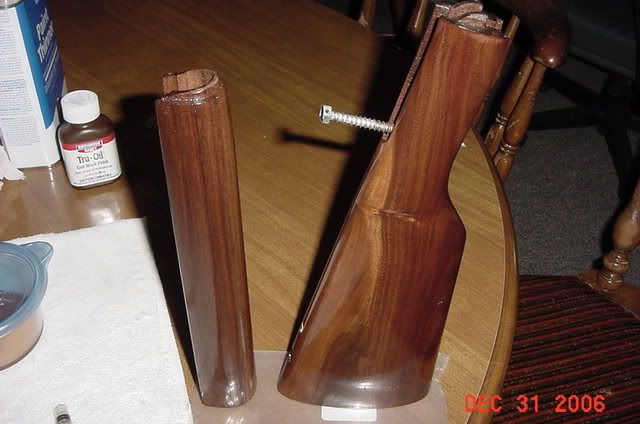
Wood Finish
Buttstock
I tried to remove the finish on the buttstock that Marlin applied but had no luck with KleenStrip or Easy Off oven cleaner, I was going to save the checkering and refinish the buttstock with the forend but after seeing a gentleman’s gun by the handle of 45/70 that had the checkering removed I decided that sanding was the best way to get rid of that dang finish! I’m glad I did it gave the gun a nice clean look and matched the forend. Thanks 45/70!
I have the least experience with wood finishing, I love trigger work on double and single action revolvers, hand checkering a front strap on a colt 1911 or cutting a Novak sight on a 1911 slide, most anything to do with a gun or steel, wood finishing just has not come up to often.
My GG had very light two-toned wood from the factory, if you notice even the forend is actually two different colors from the right to the left side. So I wanted to stain the wood along the lines of the old school Winchesters and French Red stock filler from Brownells looked like just the ticket. Followed the directions on the can, one heavy coat let set for 10-15 minuets then rub it in by hand across the grain, I did remove the excess with a paper towel afterwards and let dry for 24 hours.
Thank goodness they make a product called Tru-Oil, this stuff is great! I cut 50/50 with mineral spirits for the first 6 or so coats but switched to 100% Tru-Oil for the last 4 or 5 coats, all rubbed in with my fingers. The stuff dries in a couple of hours a light buff with steel wool and it’s ready for another coat. I used 0000 steel wool as the final finish on my stock to give it a warm old hand rubbed finish. While it was hand rubbed without the steel wool treatment it was high gloss shiny finish, just did not look right on the rifle, but it was a beautiful finish nun the less.
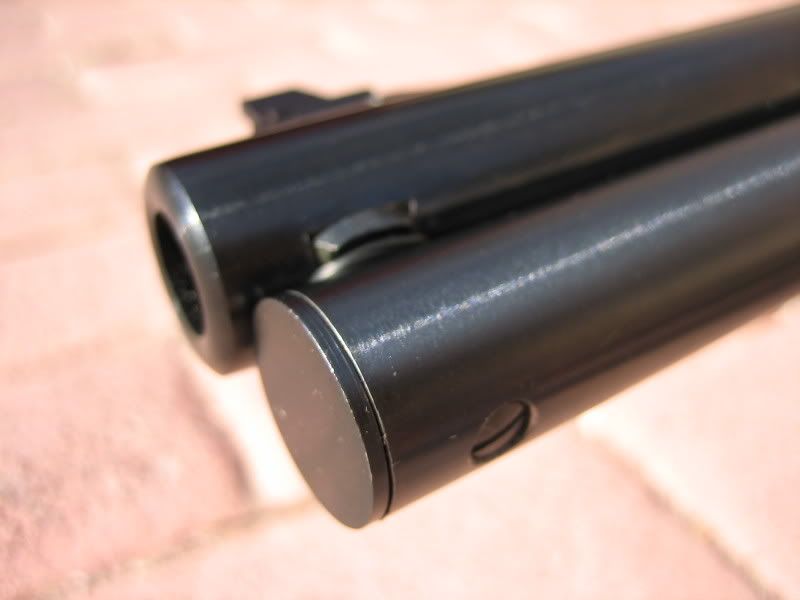
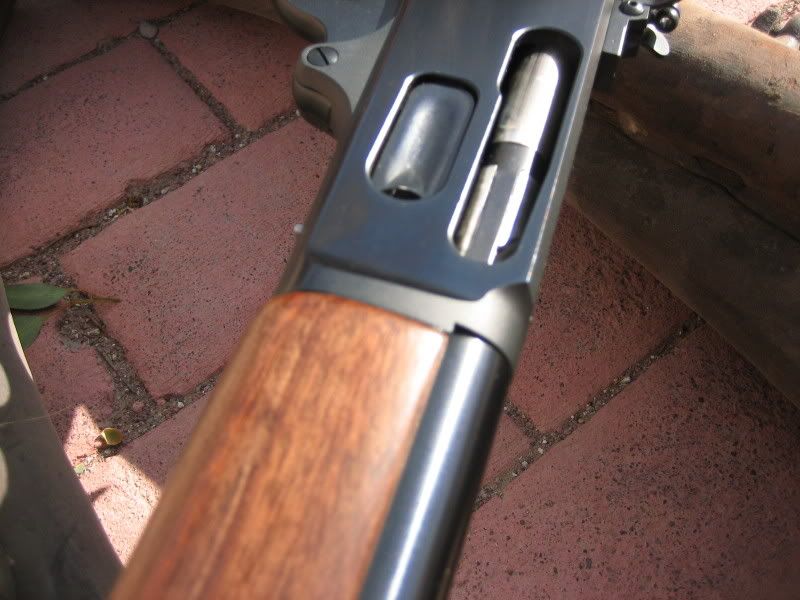
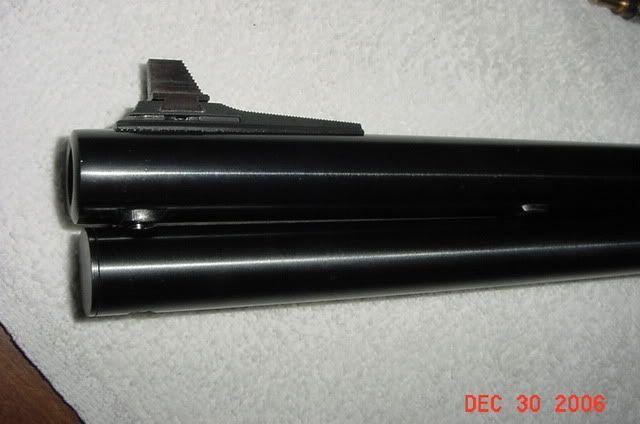
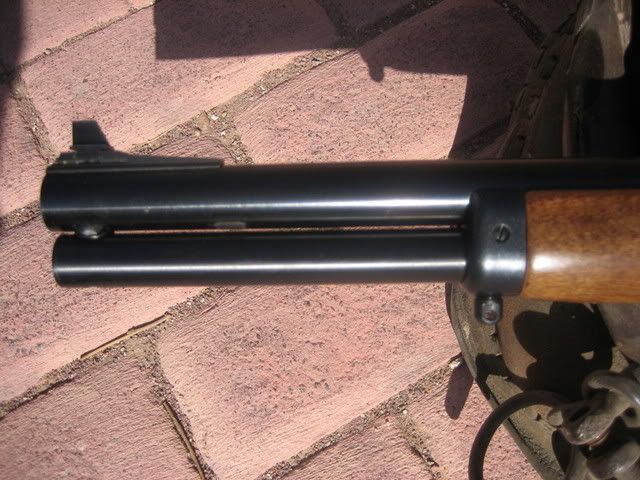
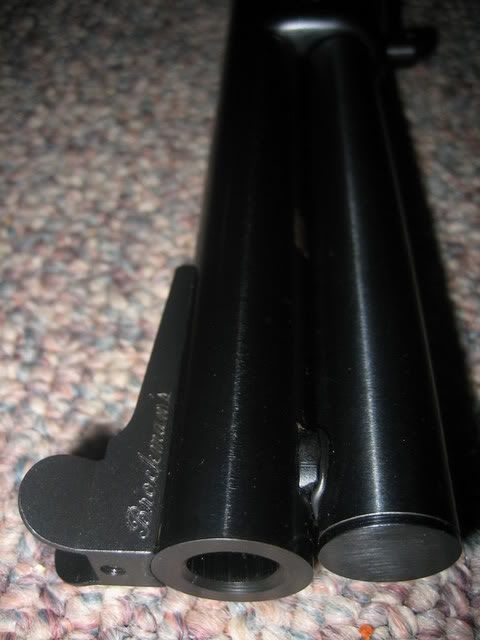
Full Length Mag Tube
The full length mag tube borders on the edge of being cosmetic in nature but it does allow you to carry two additional rounds in the tube, wile it is true if you cant kill it with three in the tube five aint gonna help ya, same can be said for one, so a single shot should suffice. Oh heck, I think it looks grand! If it throws the balance off just download it.
To pull this off, you need to order a mag tube from Brownells for the 1895CB, that’s it, you can use the same spring and hardware from your GG.
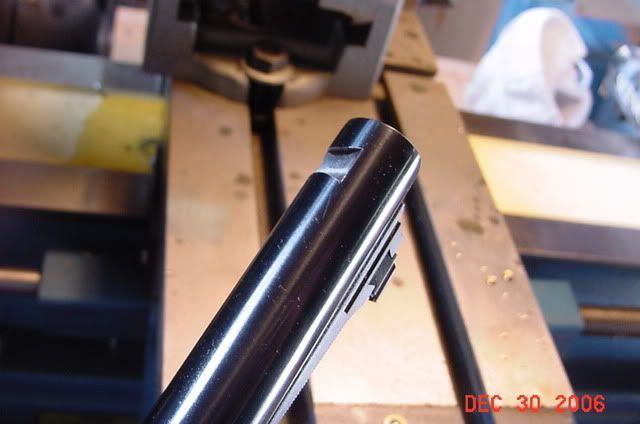
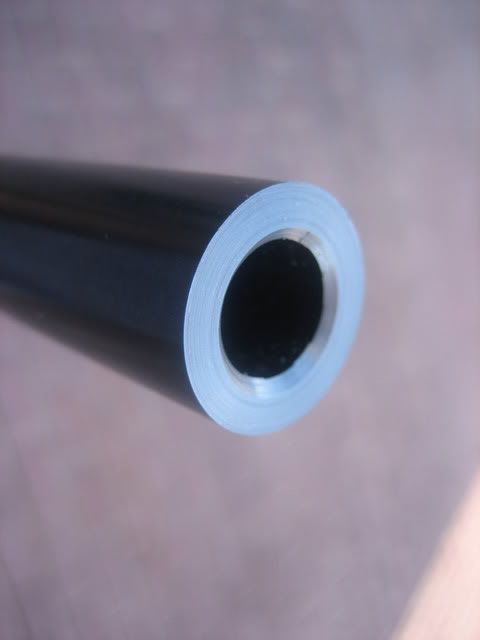
The only trick to this is deciding if you want your mag tube to end, flush with the end of the barrel or stop short a bit, I definitely did not want it to overshoot the barrel. I looked at tons of pictures and I did not like how some of the full length tubes stopped way to short, then I saw some that ended flush and that looked good. Then I looked at my Winchester 94 Trapper and it stopped about an 1/8” short so I went with that, decisions, decisions!
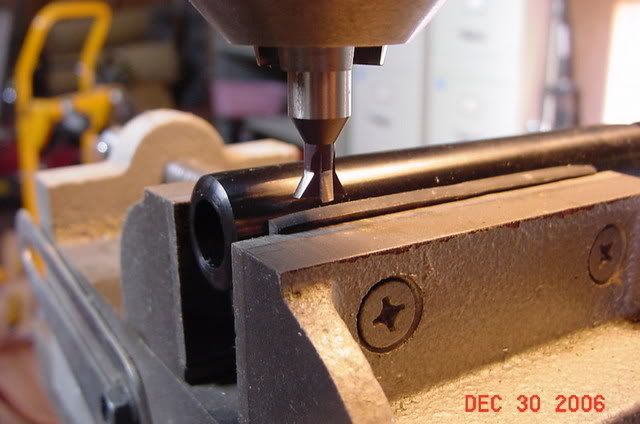
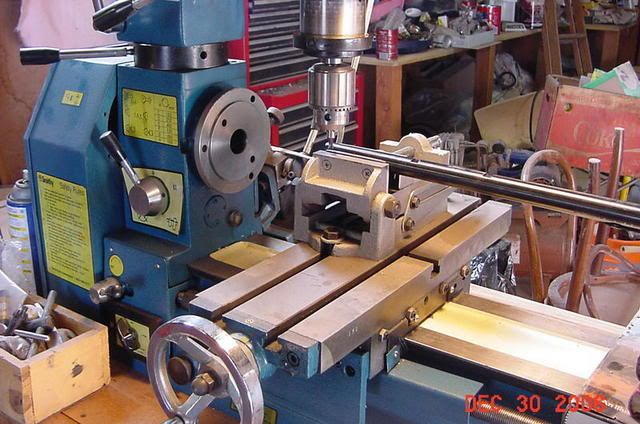
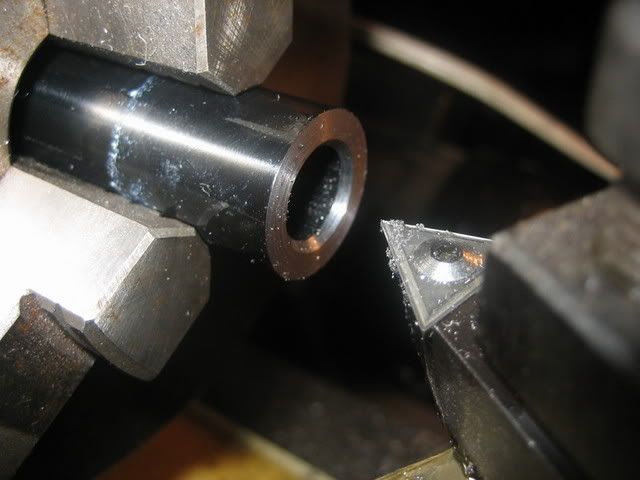
Next is measuring and cutting the dovetail, I have a Smithy combination Lath, Mill, Drill (Paid for with one of my 1911 builds) so cutting the dovetail was a snap. You can order a simple yet totally sufficient dovetail cutting kit from midway for around $20.00
http://www.midwayusa.com/eproductpage.exe/showproduct?saleitemid=720537
http://www.marlinowners.com/board/viewtopic.php?t=16069
Make sure they give you a 65 degree site file. Thanks for the links “the_mad_rshn”
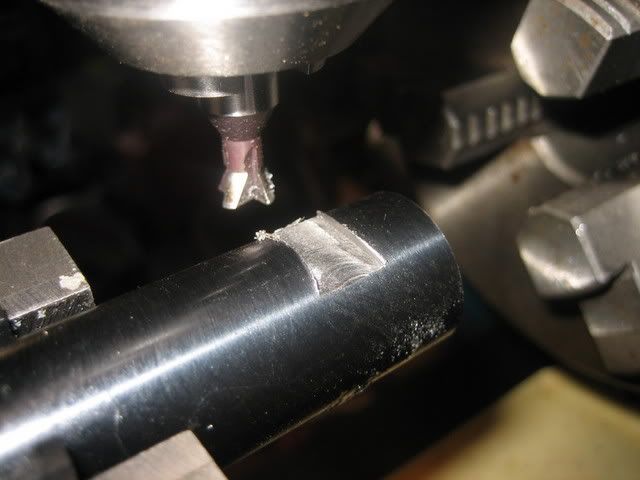
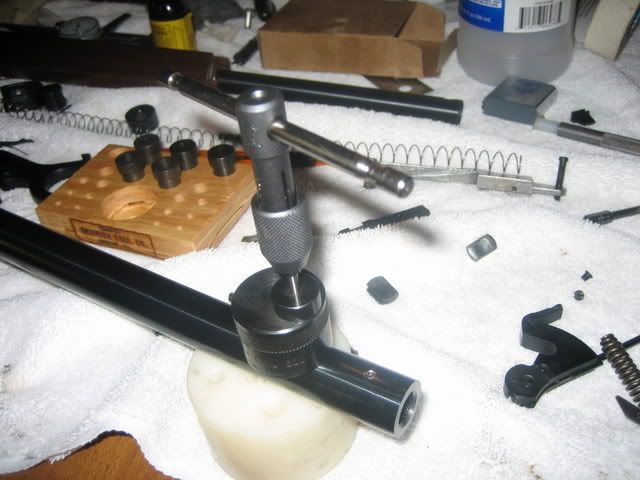
Once the dovetail is cut and the Magazine Tube Stud is set in the barrel, drill the holes in the mag tube, using the existing holes as location guides so you make sure the cartridge bulge is properly located when you install the new tube. Be very critical of the smaller of the two holes, the small one must be precise! You do get a little play at the receiver end so don’t get to nervous, when you are happy with your two mounting holes, make your final measurement and double check it with the Magazine Tube Plug, then take the tube back to the chop saw with a metal cutting blade and lop it off. Clean up all cuts and drill holes with files and stones and cold blue.
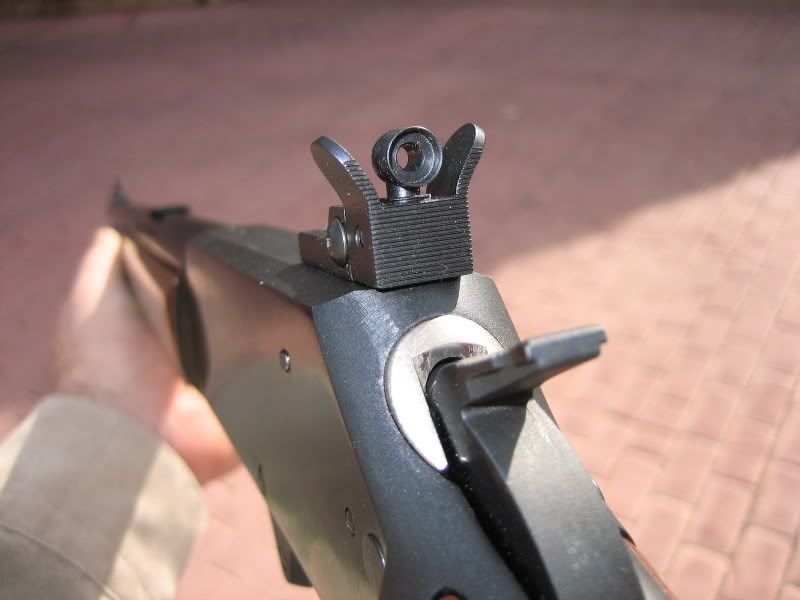
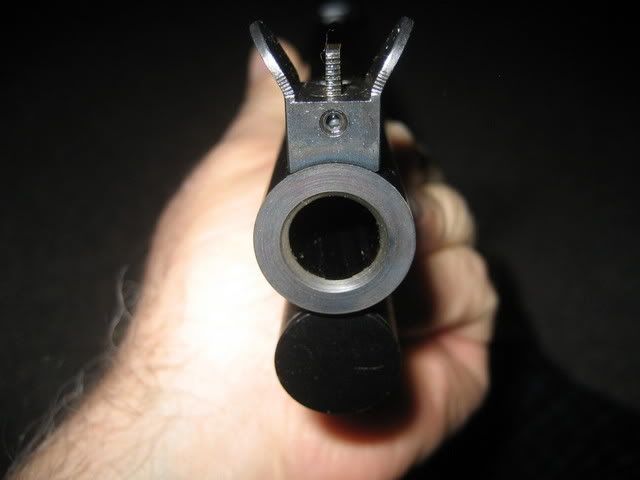
Sights
Another difficult decision, so many nice sight systems out there, I finally settled on Brockmans Rear Peap and and Brockmans Front site blade .080” I have his winged front site on Back Order with Brownells. I plan to narrow it to .080” when I get it. I prefer a fairly narrow black front site blade above all else.
I also ordered two 3/8” Marbel Slot Blanks to fill the site dovetail and the Magazine Stud dovetail. The Magazine stud dovetail needed to be filed down and relieved so as not to interfier with the new magzine tube.
I wanted to list some special thanks to a few Forum sites and there members that welcomed me in since I got the Guide Gun Bug and have supplied so much information for the asking and camaraderie. I hope in some way this little write up can pay back all that you all have given so freely, thank you.
http://www.marlinowners.com/board/
http://leverguns.sixgunner.com/default.asp?CAT_ID=1
http://www.levergunluvers.com/phpBB2/index.php
PART TWO
Pugslie is born!
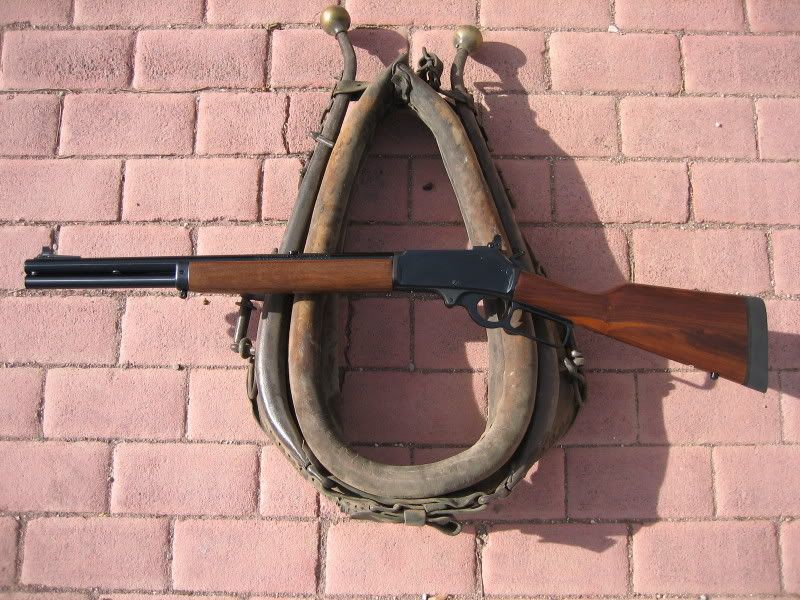
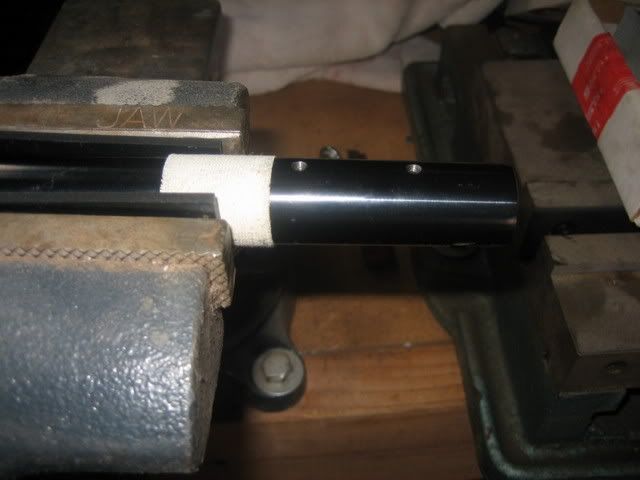
Not leaving well enough alone, I decided the Guide Gun needed a bit more work and a 16 ¼” barrel would be just the ticket. By moving the front site out to the end of the barrel I would only loose about an inch of sighting distance, by having a full length magazine tube I would have 5+1 ammo capacity and in reality would probably only loose 40-50 fps in my hand loads. So it seemed like a great trade off for so much gun in such a small package! Pugslie is the smallest rifle I own now, isn’t she cute.
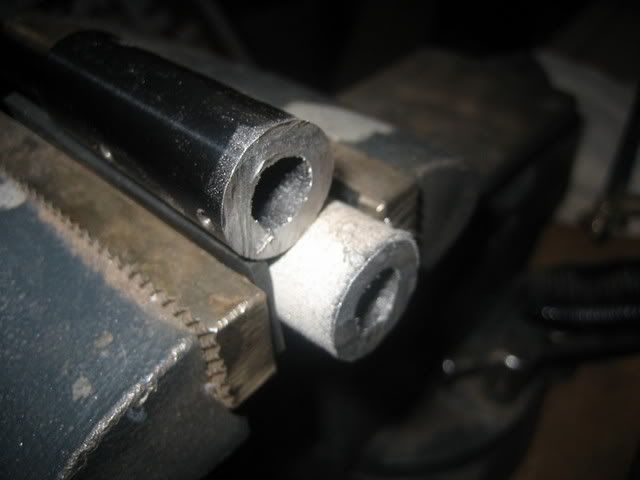
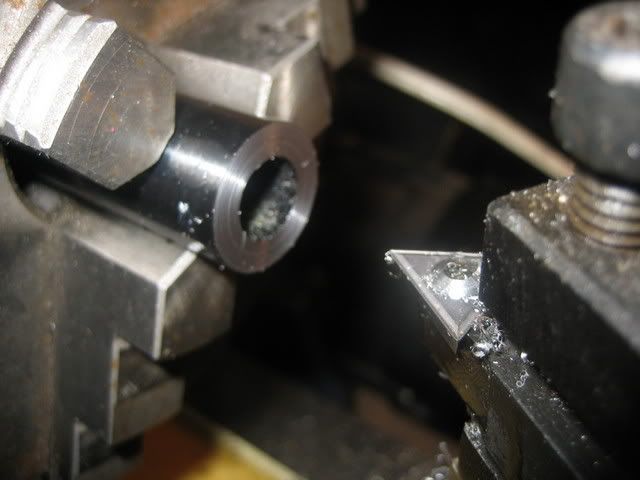
I started by hack sawing the barrel, then squaring it up and crowning in the lath.
Then drilled and tapped the holes for the site and milled the dovetail for the magazine tube stud.
A little cold blue and fitting of the magazine tube and little Pugslie is born!
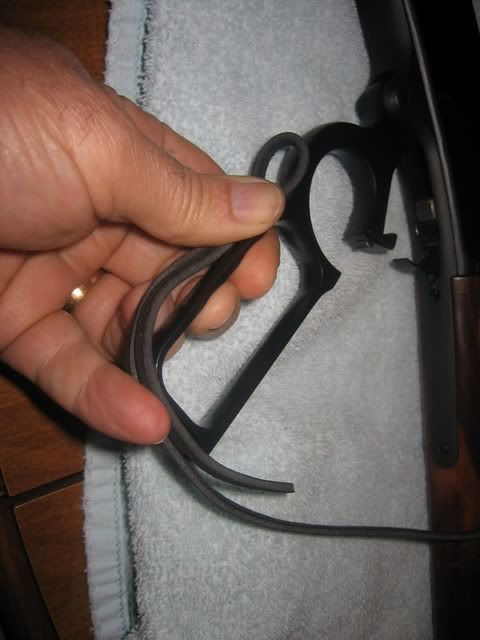
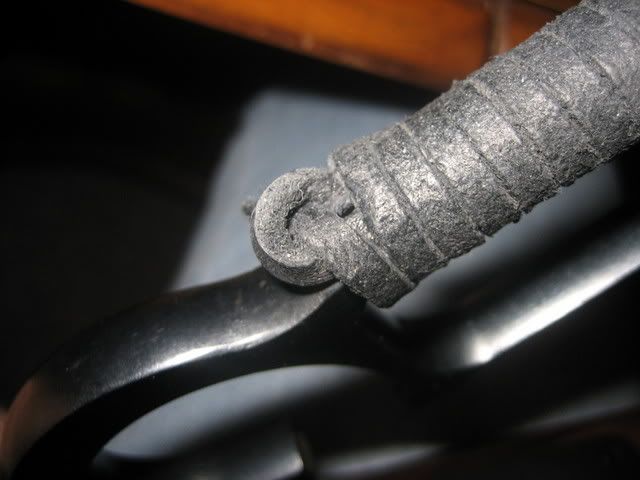
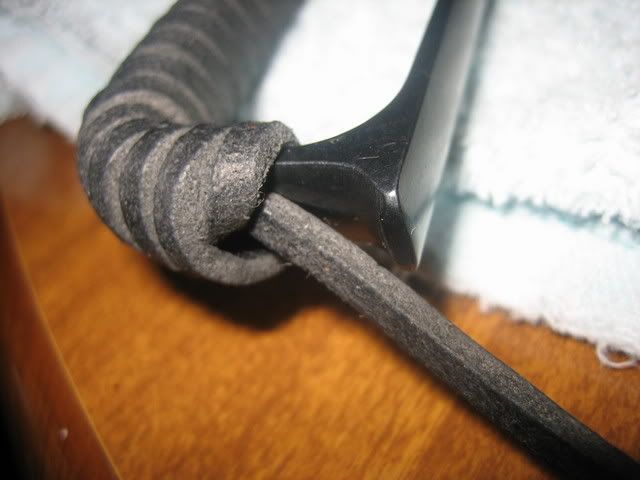
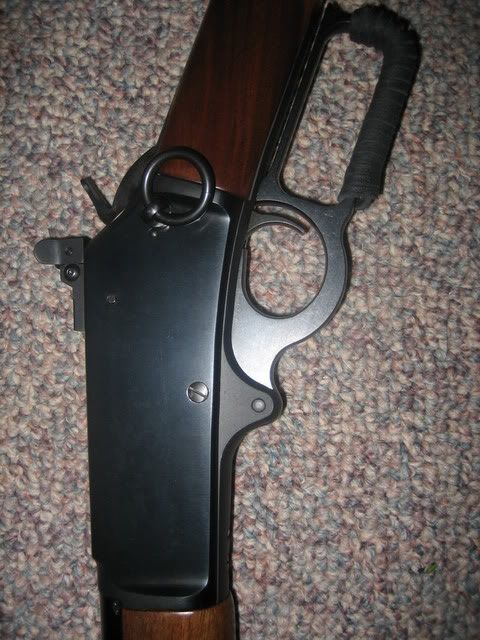
Lever Wrap 101
I thought I would share the way I use to wrap the brake and clutch levers on my 76 Shovelhead (Never did like fringe and crap flapping in the wind) figured it would work great on another type of lever.
I had an old piece of leather from the garage, it measured 38” which is just right for a Harley, but a bit longer would be easier, say 40”.
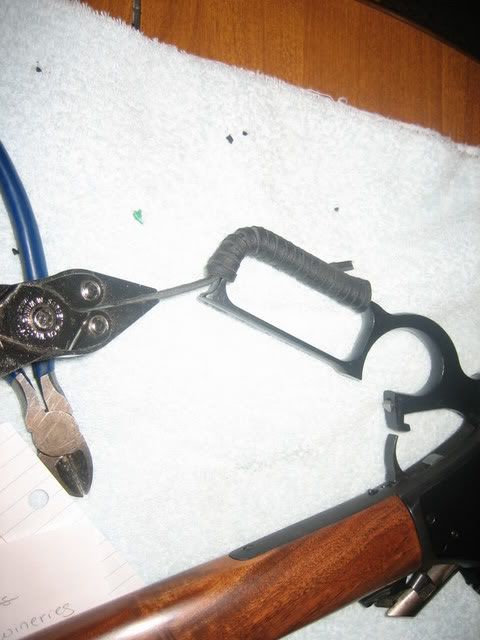
Make a loop at one end of the leather and place it toward the trigger end of the loop.
Make sure the short end is long enough that about an inch runs past the other end of the loop.
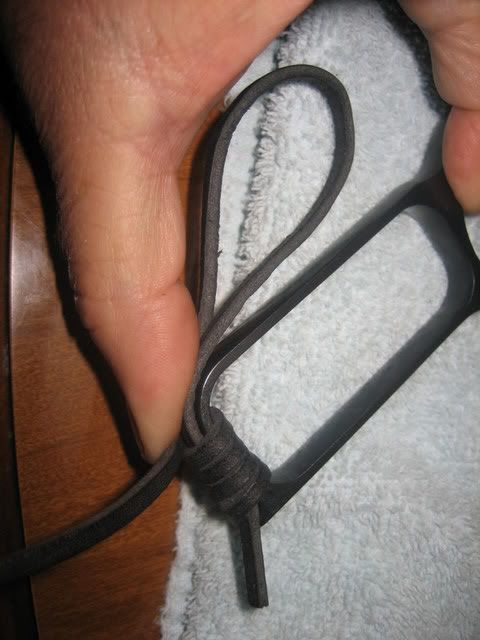
Start wrapping the leather fairly tight around the steal making sure everything lays straight and you wrap at an even fairly tight pressure.
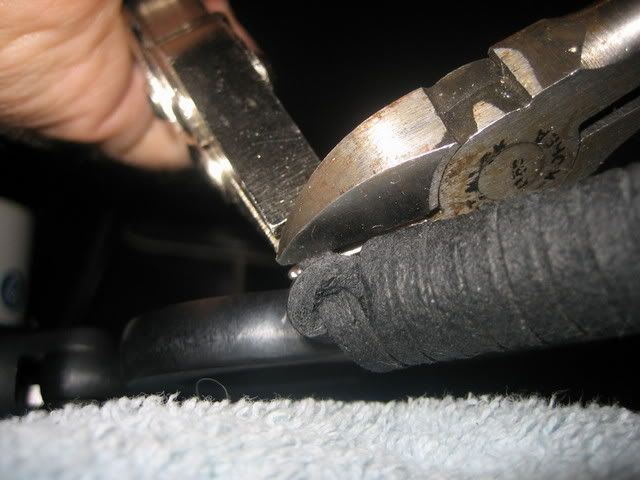
Once you wrap to the end with the leather loop you made, thread the leather through it, pull it tight and snip it off.
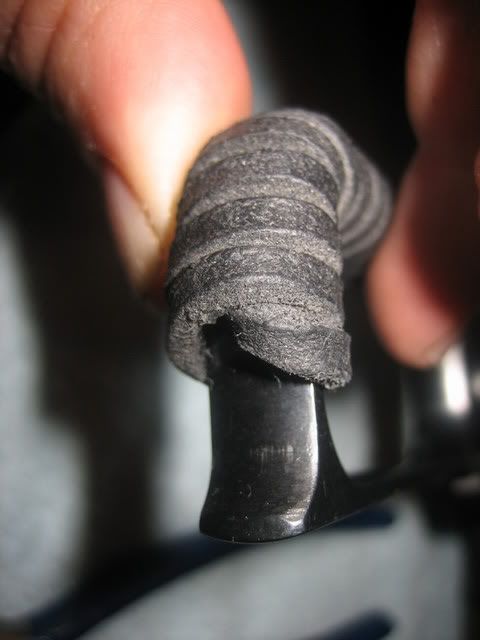
Now comes the tricky part! If you have cheap leather you will find out now. Get a pair of pliers and pull on the short end of the loop you made at the beginning, if all goes well it will suck up the end toward the trigger, never to be seen again!
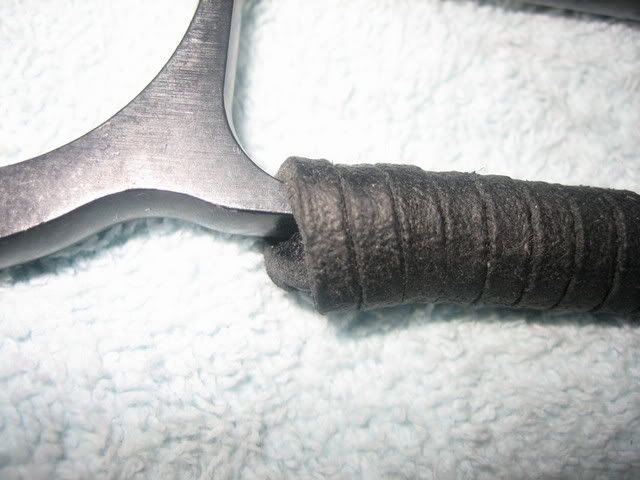
All that’s left is to trim the short end of the loop and you’re done.
No way to tell how that piece of leather ever got on there. Keep it oiled and it will last for a very, very long time considering the ware and tear the old Shovelhead got.
Have fun,
Scott
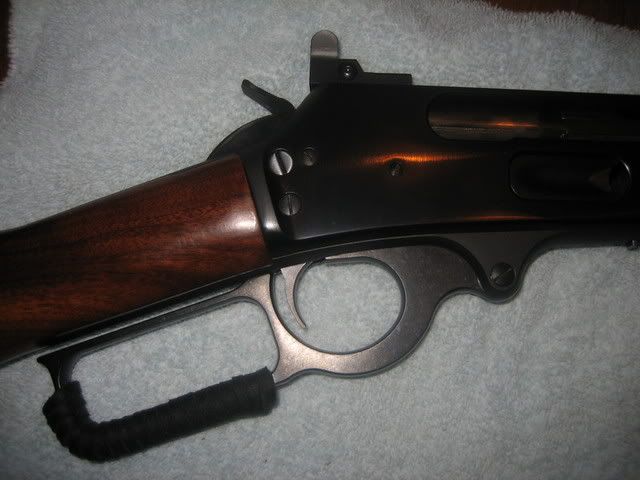
Return of the Marlin SRC
I often wondered what caused marlin to quit making a Saddle Ring Carbine? I was Googling pictures of old Marlin SRC's and noticed that they placed them were the cross bolt safety’s are today. That’s when the idea hit me to get rid of the safety and replace it with a Ludwig safety replacement kit, I drilled and tapped the kit to accept a Winchester Saddle ring, because they hold the ring off of the receiver, and will not cause the ring ware the originals caused.
I think it turned out great and finally found a real use for that cross bolt safety! No holes drilled in the receiver either and can be returned to stock at any time.
Brownells got the Brockman’s front site in finally and I got that installed and milled the site post to .075”
Pugslie is finished and ready for some serious sighting in, load development and shooting now!
Original Marlin SRC’S (I wish they were mine)
Pugslie, my 1895G
It's nice to have a project completely finished, just the way you want it!
Scott
salvo
"No arsenal, no weapon in the arsenals of the world, is so formidable as the will and moral courage of free men and women."
-- Ronald Reagan
Edited by - salvo on 07/08/2007 11:58:20 AM